I Fixed My Alarm's Worst Feature With Somebody Else's Garbage
The Problem: Teenagers, Vacations, and the Smartphone Hassle
My wife and I were heading out of state on vacation, leaving our teenage kids at home. I wanted the house locked down with a full security system, but I knew exactly what would happen if the controls only lived on a smartphone app or on the kitchen tablet.
You walk in the door, the entry delay starts counting down, and now a teenager has to pull out their phone or run to the kitchen, unlock it, load a Home Assistant dashboard, and hit "disarm" before the siren goes off and sends both dogs into a barking fit that takes twenty minutes to stop. If you have dogs, you know this struggle all too well. What I actually predicted was that the friction would win, and they would quit arming the system entirely, because opening an app every single time the dogs need to go out is too much of a hassle.
I love Home Assistant, but relying entirely on a touchscreen for physical security is a trap. I wanted a physical keypad by the door. Not a wall-mounted tablet. A dumb piece of plastic with buttons that anyone can hit without looking. Plus this gives the visual cue that they need to arm/disarm every time they walk through the door.
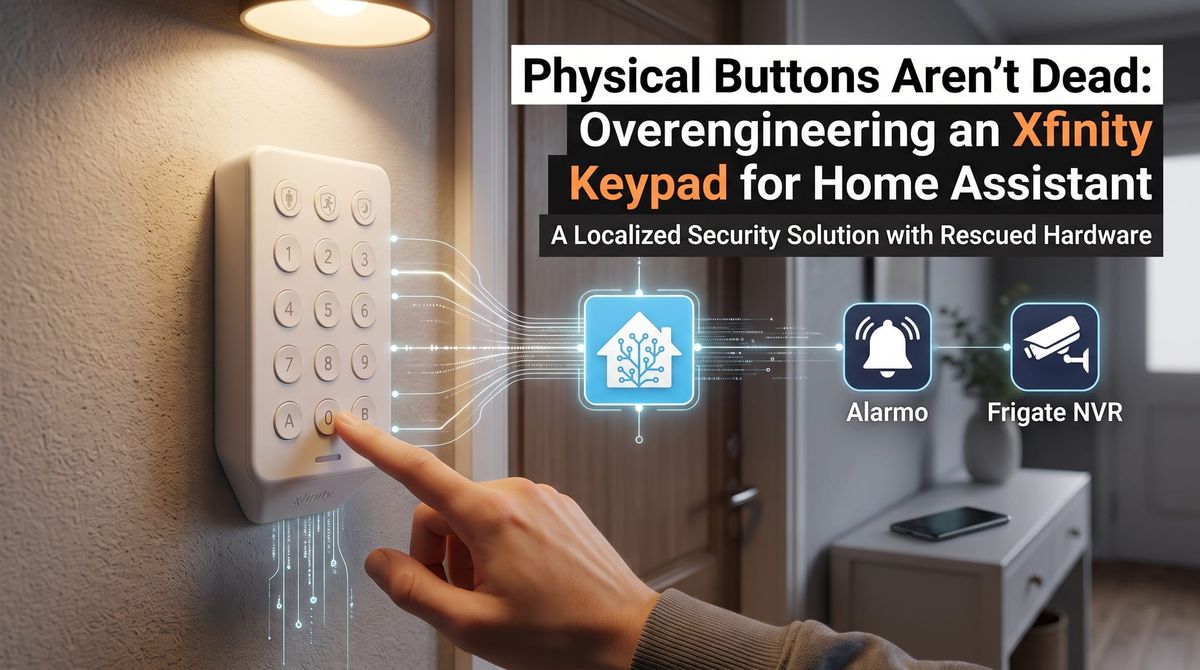
Here's how I rescued an old Xfinity keypad, tied it into Alarmo, and hooked it up to my Frigate NVR to build a local security system that actually keeps the kids accountable.
What You Need
| Part | Notes | Cost |
|---|---|---|
| Universal Electronics XHK1-UE keypad | eBay, secondhand | $15-20 |
| Zigbee coordinator | Whatever you already run ZHA on | n/a |
| 4× AA batteries | The keypad is fully battery powered | ~$4 |
| Alarmo | HACS integration, free | $0 |
| Frigate NVR | Optional, for the snapshot alerts | $0 |
Total, assuming you already have Home Assistant and a Zigbee stick: about twenty bucks and an evening.
The Hardware: Rescuing E-Waste from eBay
I could have bought a brand-new Zigbee keypad built specifically for Home Assistant, but where's the fun in that? Instead I went to eBay and picked up an Xfinity keypad for dirt cheap.
Why Xfinity? Because the market is flooded with them. When people cancel their Xfinity Home Security subscriptions, or when Xfinity swaps out their equipment, these keypads get left behind and treated as e-waste. They're solidly built, run on standard AA batteries, and speak plain Zigbee.
Admittedly I didn't come up with that idea on my own. I asked Gemini what it would recommend for a cheap keypad, and it pitched reusing an e-waste item that has flooded eBay. I was sold.
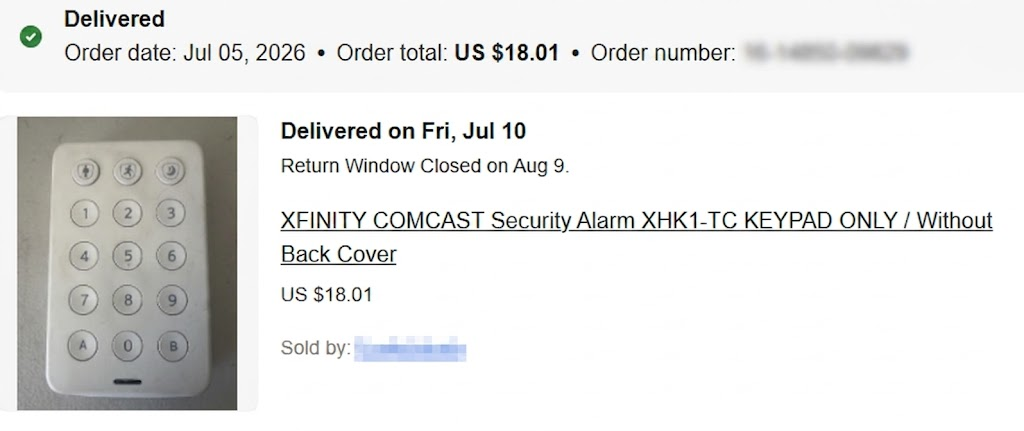
Mine came without a back plate. Turns out that doesn't matter much. The batteries are held in by tabs molded into the housing, so the plate was only ever doing two jobs. Hiding the cells and giving you something to screw into the wall. I superglued four neodymium magnets to the corners instead, and now it lives directly on the steel front door. No holes, no anchors, and it pulls off in my hand if I want to move it. Months of teenagers going through that door and it hasn't shifted. If you see a listing missing the plate, that's a discount, not a defect.
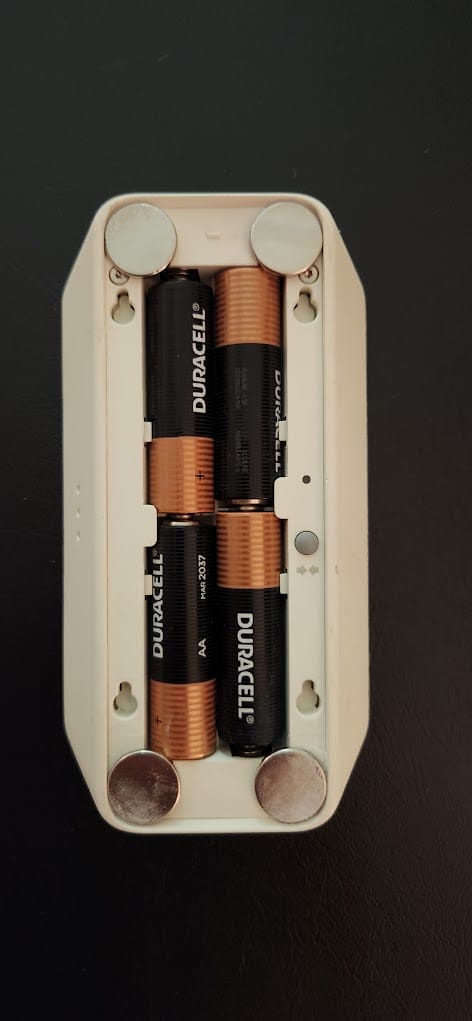
Get the variant right. Xfinity shipped at least three keypads that look broadly similar, and they are not interchangeable:
- XHK1-TC. The Technicolor build. ZHA reports it as
TKA105by Technicolor. This is the one I used and the one this guide is written against. - XHK1-UE. Made by Universal Electronics, model identifier
URC4450BC0-X-R. - XHK2. A later revision.
Listings on eBay are frequently wrong or vague, and sellers will use the photos interchangeably. Buy on the part number in the listing, and when it arrives, confirm what ZHA reports for manufacturer and model before you start writing automations against it. If yours comes up as TKA105 by Technicolor, everything below applies as written. If it comes up as something else, the general approach still holds but the specifics may not.
I specifically wanted this variant because the top row of buttons selects the arming mode (away, stay, night) instead of burying mode selection behind a key sequence.
Pairing It to ZHA
Mine was a bit fickle. I did multiple battery pulls and pressed the tamper button on the back, then opened ZHA, hit "Add Device," and waited. When that didn't take, I tried a different order and ran it again. Then another. By the time it finally showed up I had genuinely lost track of what sequence I was on, so I can't hand you a recipe here. It took under five minutes, but it was five annoying minutes with no feedback telling me whether I was getting closer or wasting my time.
Since the keypad is dumb, which I know is what I wanted, it doesn't tell you anything while you're doing this. No lights or chirps to let me know I finally pulled all sevens. Don't assume yours is busted after a couple tries. Be persistent.
Once it's joined, grab the identifier you'll need for the automations below. Go to Settings, Devices & Services, Devices, and open your keypad. The device ID is the long hex string at the end of the URL in your browser's address bar. It appears in the YAML further down as a placeholder. Substitute your own.
A word of warning before you build on this: a freshly paired keypad on ZHA is just a button spammer. It fires events. It has no idea what an alarm is. All the intelligence lives in Home Assistant.
Under the Hood: Intercepting ZHA Events
For the alarm state machine itself I use Alarmo. It handles sensor groups, entry and exit delays, arming modes, trigger logic, and, importantly, PIN validation for multiple users.
The trick was getting the keypad to talk to Alarmo cleanly. The keypad doesn't expose a nice entity you can wire up. When you punch in a code and hit a mode button, it fires a raw zha_event carrying the mode and the typed digits. So I intercept the event, pull out the two fields I care about, and hand them to Alarmo.
The arm modes aren't arbitrary numbers someone picked. The keypad is speaking the Zigbee Cluster Library's IAS ACE cluster (0x0501, or 1281 in decimal), which is the standard cluster for ancillary control equipment. Keypads, in other words. Its Arm command carries an arm mode field with a defined enum:
| Value | Meaning | Alarmo action |
|---|---|---|
0 | Disarm | alarm_disarm |
1 | Arm Day / Home Zones Only | alarm_arm_home |
2 | Arm Night / Sleep Zones Only | alarm_arm_night |
3 | Arm All Zones | alarm_arm_away |
Knowing that is what turns this from copy-paste into something you can adapt. Any keypad that implements IAS ACE properly will send the same four values, so this pattern is portable well beyond the Xfinity hardware.
alias: 'Alarm: Raw Keypad Events to Alarmo Multi-PIN'
description: >-
  Captures raw arm commands from ZHA events and forwards the typed code
  to Alarmo, which does the actual PIN validation.
triggers:
  - event_type: zha_event
    event_data:
      command: arm
    trigger: event
conditions:
  - condition: template
    value_template: "{{ trigger.event.data.device_id == 'YOUR_DEVICE_ID_HERE' }}"
actions:
  - choose:
      - conditions:
          - condition: template
            value_template: '{{ trigger.event.data.params.arm_mode == 0 }}'
        sequence:
          - action: alarm_control_panel.alarm_disarm
            target:
              entity_id: alarm_control_panel.alarmo
            data:
              code: '{{ trigger.event.data.params.code }}'
      - conditions:
          - condition: template
            value_template: '{{ trigger.event.data.params.arm_mode == 1 }}'
        sequence:
          - action: alarm_control_panel.alarm_arm_home
            target:
              entity_id: alarm_control_panel.alarmo
            data:
              code: '{{ trigger.event.data.params.code }}'
      - conditions:
          - condition: template
            value_template: '{{ trigger.event.data.params.arm_mode == 2 }}'
        sequence:
          - action: alarm_control_panel.alarm_arm_night
            target:
              entity_id: alarm_control_panel.alarmo
            data:
              code: '{{ trigger.event.data.params.code }}'
      - conditions:
          - condition: template
            value_template: '{{ trigger.event.data.params.arm_mode == 3 }}'
        sequence:
          - action: alarm_control_panel.alarm_arm_away
            target:
              entity_id: alarm_control_panel.alarmo
            data:
              code: '{{ trigger.event.data.params.code }}'
mode: single
The nice part is that I never touch PIN validation myself. I pass the typed digits straight through and Alarmo either accepts them or rejects them. That means I get per-person codes for free, which matters a lot in the notification section below.
If you want to see the raw payload for your own keypad before writing any of this, open Developer Tools → Events, listen for zha_event, and go mash buttons.
The Master Notification: Accountability and Verification
This is where the security system stops being a lock and starts being a witness.
Because every person has their own PIN in Alarmo, the system knows who is standing at the keypad. If one of the kids disarms it to take the dogs out, I get a notification with their name on it, so I know who to text if it never gets re-armed.
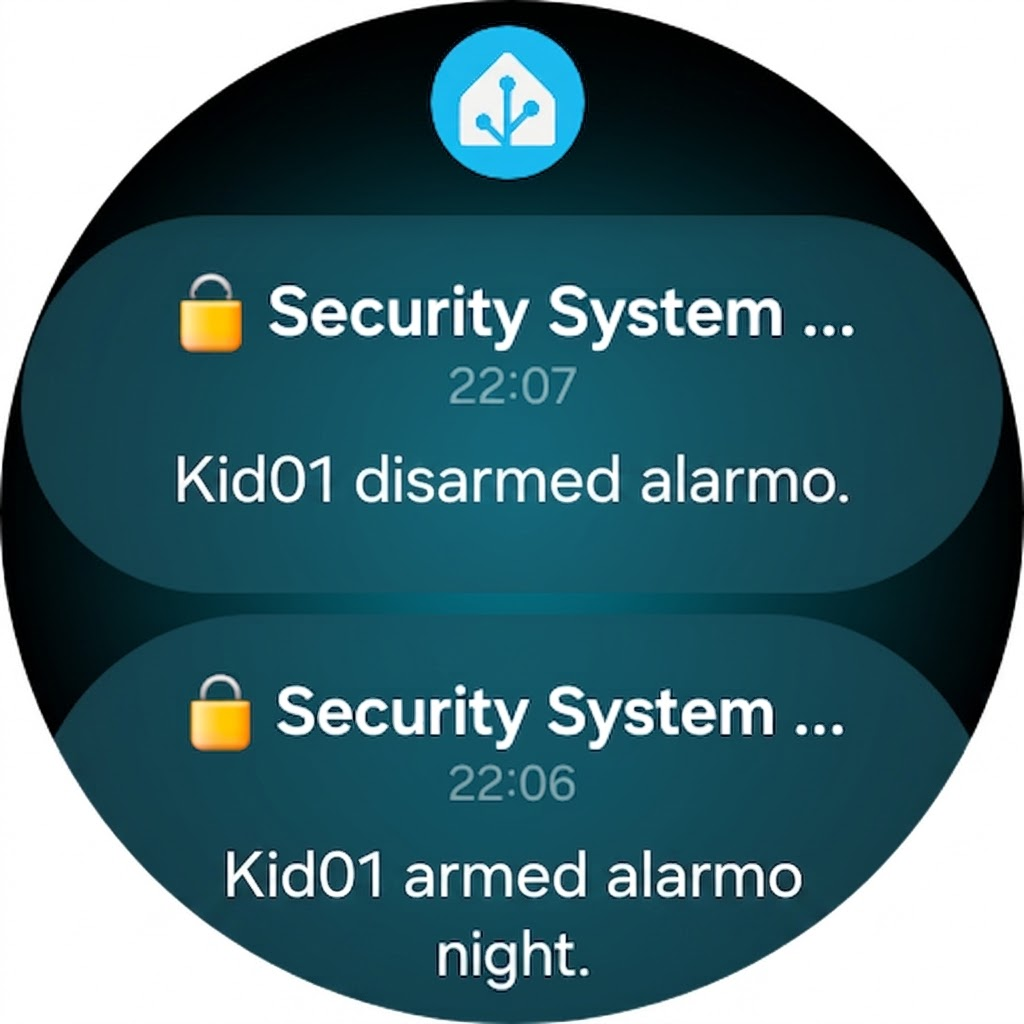
And if the alarm genuinely triggers while I'm a state away, a blaring siren over the smart speakers back home tells me nothing useful. I'm already running Frigate, so I tied the two together: the notification includes a camera view of the door that was actually opened.
One automation handles all three cases.
alias: 'Alarm: Security System Activity Notifications'
description: >-
  Alerts showing who armed/disarmed the system, or a camera view of the
  tripped entry point if it triggers.
triggers:
  - entity_id: alarm_control_panel.alarmo
    trigger: state
conditions: []
actions:
  - choose:
      # ---------- TRIGGERED ----------
      - conditions:
          - condition: state
            entity_id: alarm_control_panel.alarmo
            state: triggered
        sequence:
          - variables:
              open_sensors: "{{ state_attr('alarm_control_panel.alarmo', 'open_sensors') }}"
              target_camera: >-
                {% set s = open_sensors.keys() | list if open_sensors else [] %}
                {% if 'binary_sensor.front_door' in s %}
                  camera.front_interior
                {% elif 'binary_sensor.back_door' in s or 'binary_sensor.garage_entry_door' in s %}
                  camera.rear_interior
                {% else %}
                  none
                {% endif %}
              sensor_names: >-
                {% if open_sensors %}
                  {{ open_sensors.keys() | map('device_attr', 'name_by_user')
                     | reject('none') | list | join(', ')
                     | default(open_sensors.keys() | join(', '), true) }}
                {% else %}
                  an unknown sensor
                {% endif %}
          - action: notify.mobile_app_your_phone
            data:
              title: "⚠️ ALARM TRIGGERED"
              message: "Tripped by: {{ sensor_names }}"
              data:
                channel: Alarm
                importance: high
                priority: high
                ttl: 0
                notification_icon: mdi:shield-alert
                color: "#c62828"
                image: >-
                  {% if target_camera != 'none' %}
                    /api/camera_proxy/{{ target_camera }}
                  {% endif %}

      # ---------- ARMED ----------
      - conditions:
          - condition: template
            value_template: >-
              {{ trigger.to_state.state in ['armed_home', 'armed_away', 'armed_night']
                 and trigger.from_state.state != trigger.to_state.state }}
        sequence:
          - action: notify.mobile_app_your_phone
            data:
              title: "🔒 Security System Armed"
              message: >-
                {% set user = state_attr('alarm_control_panel.alarmo', 'changed_by') %}
                {% set mode = trigger.to_state.state | replace('armed_', '') %}
                {{ (user ~ ' armed the system ' ~ mode ~ '.') if user
                   else ('System armed ' ~ mode ~ '.') }}

      # ---------- DISARMED ----------
      - conditions:
          - condition: state
            entity_id: alarm_control_panel.alarmo
            state: disarmed
          - condition: template
            value_template: >-
              {{ trigger.from_state.state in
                 ['armed_home', 'armed_away', 'armed_night', 'triggered', 'pending'] }}
        sequence:
          - action: notify.mobile_app_your_phone
            data:
              title: "🔓 Security System Disarmed"
              message: >-
                {% set user = state_attr('alarm_control_panel.alarmo', 'changed_by') %}
                {{ (user ~ ' disarmed the system.') if user else 'System disarmed.' }}
mode: queued
max: 10
Watch out here, the notification payload is different for Android and iOS and nothing will warn you if you use the wrong one. I'm on Android, which I understand makes me the Sith in this scenario. I've made peace with it. The keys are channel, importance, priority, and ttl: 0. Those last two are what get it delivered right now instead of Doze sitting on it until Android feels like it. Which it will do at 3 a.m. Test it for real. Trigger the alarm with your phone in Do Not Disturb and see if it actually wakes you up.
One more Android gotcha: setting channel: Alarm creates a dedicated notification channel, but you still have to go into Android's own app notification settings and mark that channel as allowed to override Do Not Disturb. Home Assistant cannot set that remotely. Do it once, then test it.
Don't dump alarm snapshots into /config/www/. My first version wrote a snapshot to /config/www/alarm_trigger.jpg and attached it as /local/alarm_trigger.jpg. That works, and it's the pattern half the tutorials online use, and it means the most recent interior photo from your alarm is sitting at a completely unauthenticated URL. The /local/ path requires no login. If your instance is reachable from outside at all, anyone with the URL has it.
Using /api/camera_proxy/camera.your_camera instead keeps everything behind Home Assistant's auth, since the companion app fetches it with its own token. The tradeoff is honest: the proxy returns a current frame at fetch time, not the frozen moment of the trigger. For "what is happening at my house right now," I'd argue that's the better image anyway. If you specifically want the trigger moment preserved, take the snapshot, but write it to a timestamped filename outside www/ and clean up after yourself.
Use mode: queued with a max rather than parallel. Alarmo's state can change several times in under a minute during a real event: armed, then pending when the door opens, then triggered, then disarmed when someone finally punches in the code. In parallel those runs execute at the same time and can finish out of order, so you get "System disarmed" on your phone before "ALARM TRIGGERED" because the second notification overtook the first while it was waiting on a camera image. queued runs them one at a time in the order the events actually happened, and the max caps how deep that line can get.
The Gotchas (Because Nothing Is Ever Easy)
If you are going to replicate this setup, be aware that these repurposed keypads have a few quirks. It took some trial and error to get the logic smoothed out.
The four-digit hard limit. The firmware on this keypad only wants four digits, and I found that out the hard way. I set my PIN to six, punched it in, and the pad started acting wonky. Or that's what it felt like at the time. Nothing was broken. Remember this thing is a button spammer, and what it actually does is fire off the payload the moment it hits four digits and then start a fresh buffer for whatever you type next. So my six digit PIN was going out as a four digit code that Alarmo rejected, plus two orphaned digits sitting in a buffer waiting to poison my next attempt. I only sussed this out by sitting in Developer Tools watching the zha_event stream while I typed. If you're used to six or eight digit codes, scale back to four.
The buffer clearing sequence. Order of operations matters. You type the four digit PIN first, then press the mode button. If you press the mode button first and then type the code, the keypad immediately clears its internal buffer and the event fails silently. Tell everyone in the house up front, because nothing on the keypad explains what went wrong.
The status LEDs lie to you. This is the one place the rescued hardware loses to a purpose-built keypad. The keypad lights up whatever mode it last saw itself send. If you arm from your phone while you are in bed, the keypad has no idea, and when its proximity sensor wakes the display in the morning it will confidently show the wrong state. In theory you fix this by pushing the state back down the same IAS ACE cluster whenever Alarmo changes. In practice I never got it working reliably, and I suspect the reason is that this is a sleepy end device: it powers its radio down between button presses, and its parent router only holds a buffered message for a few seconds before dropping it. Alarm state changes and keypad wake-ups are not correlated, so most of what you send arrives when nobody is listening. If you find a version that works, I would like to hear about it. Until then, treat the keypad as an input device and trust the dashboard for status.
The master code field. Home Assistant wanted to block empty master code fields when passing data over to Alarmo, which took some templating to work around.
One security note while you are here. Zigbee encrypts every frame, so a sniffer that shows up after your network is already running sees nothing useful. The exposed moment is the join itself, when the network key is handed to the new device in a way that can be captured. It lasts seconds, and it only matters to someone sitting outside waiting for it. The practical advice is simple: use a PIN that unlocks nothing else, and do not re-pair your security devices on the same day you publish an article about your security system.
The Verdict: Peace of Mind (and Teenage Grumbles)
So how did it hold up while we were away?
I won't lie. Punching in a code every time the dogs need out is still a hassle, and there were grumbles the few times I had to send a message asking why the system wasn't rearmed. Some friction is unavoidable. The trick was making it small enough that they'd tolerate it, which a PIN and a button manages and an app never did.
The Frigate integration turned out to be the MVP of the trip. We had a couple of accidental triggers (again, teenagers), and instead of a heart-pounding "the alarm is going off and I'm 400 miles away," my watch buzzed with an alert showing exactly which door and exactly what was on the other side of it. I could see it was an accident with in five seconds without wrestling live camera feeds over hotel Wi-Fi. I patiently waited for them to follow the procedure to disarm and then rearm again after the dogs came in.
Physical buttons, local control, rescued hardware, instant visual verification. Twenty dollars and some digging through Zigbee clusters.
No monitoring company. That's not a compromise I settled for, it's the point. I don't want an external security company all up in my business, holding an account on my house and billing me monthly for the privilege. If the alarm trips, it notifies me, not a call center in another state.
The obvious objection is what happens when something goes down. Home Assistant sits on a battery backup, so a short outage is a non-event, and if it were actually down I'd know from six other things breaking first. A power outage long enough to drain the UPS takes the whole thing out. So does a commercial panel without battery backup, and plenty of them ship that way unless you pay for the tier that includes it. Lose internet and I lose remote notifications, but only while I'm away. I've had the WAN go down and the alerts still landed on my phone at home, because the app talks to Home Assistant directly on my own network. Either way the alarm still arms, still trips, and still makes noise. All of it runs locally. A cloud-dependent system can't say that.